I’ve been a master home inspector since 2003 and in the 15,000+ home inspections I’ve personally performed, there are 5 areas inside a home that cause more disappointment, heartache, and broken dreams than any other.
You’ll learn about these areas below but an even bigger reason I wrote this house inspection checklist is because I’ve worked with hundreds of homebuyers who have paid me thousands of dollars to inspect multiple homes because of them.
And the vast majority of issues were visible to anyone. They just didn’t know better.
So, I took the major-items home inspection I sell every day to real estate investors and homebuyers for $395 and put it into print. This way I can give you the same insights to help you avoid the same mistakes they made.

How can a house inspection checklist help you save time, money, and headaches when buying a home?
A hot real estate market means you have to act fast, or you’ll lose a house to someone else. Being armed and ready to make a confident offer (or not) can make the difference between purchasing a home you love or being stuck in a house you hate.
Save time and money by NOT paying for home inspections on homes with bad bones.
Save time and trouble by NOT submitting sales offers on homes you won’t want to buy.
A home inspection checklist will never replace a professional home inspection, but it can do this…
While nothing replaces the thoroughness of a professional home inspection, a well-prepared house inspection checklist will help you focus on the key areas of a home that source 80% of its major issues.
If this is timed right (like when you are touring the home), you’ll have the insight to protect yourself from wasting hundreds of dollars on home inspection fees for a home you won’t want to buy.
Why are these 5 areas so important?
These five key areas often determine the overall integrity and value of a home. Issues in these areas can be costly to repair and are typical deal breakers.
What are the 5 most Important areas in a home?
- Foundation
- Plumbing
- Roof
- Electrical
- HVAC System
Question: What is the single most important system in a home?
Answer: The plumbing system
When it comes to inspecting a home, the plumbing system is the most crucial area because it can hide serious problems like water damage and mold. These issues are often not visible until they’ve caused significant harm, potentially leading to costly repairs and health concerns. Ensuring the plumbing is in good condition can prevent these hidden problems from becoming major headaches.
This is why we DO NOT perform a home inspection unless absolutely necessary if the water is not running through the faucets.
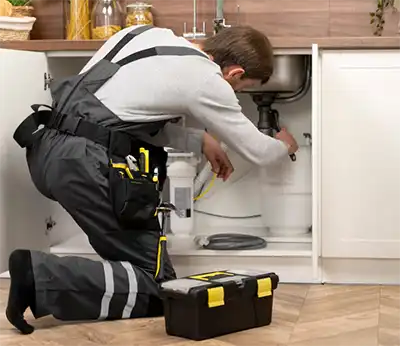
📢 But before you execute this headache-saving house inspection checklist, let’s cover some important housekeeping items:
1) Stick to the bones
These 5 areas will cover 80% of the big-ticket problems in a home while only taking about 30 min. to check.
2) Stay safe
Know your limits and don’t take unnecessary risks. No home or any amount of money is worth your health.
3) Leave the rest of the home to a professional home inspector
If the house passes your sniff test, that’s great! But it’s only half the story. It’s important to call on a professional home inspector to cross the finish line.
1st – Foundation

Spending a few minutes checking the foundation using a targeted house inspection checklist can literally mean the difference between spending hundreds and thousands of dollars on home inspection fees.
Cracks: The Difference Between Vertical vs. Horizontal
Vertical Cracks: These cracks run up and down and are the most common type in foundations. They are often caused by the natural settling of a house and are usually less serious than horizontal cracks. Vertical cracks can often be repaired with epoxy or urethane injections, costing approximately $500 to $1,500 depending on the severity and length.
Horizontal Cracks: These cracks run parallel to the ground and are typically a sign of more severe structural issues, such as hydrostatic pressure pushing against the walls. They are more alarming because they can indicate that the foundation is failing to withstand external pressures. Repair methods might involve more complex solutions like reinforcing the foundation walls with carbon fiber or steel braces, potentially costing upwards of $4,000 to $15,000.
Types of Shifting and Movement
Settlement: Over time, a house’s foundation may settle due to the soil underneath compacting. This is often seen in older homes and can cause minor cracks and shifts.
Heaving: Heaving occurs when the soil expands, lifting the foundation. This is often due to changes in moisture levels in the soil, particularly with clay soils which expand when wet and shrink when dry.
Lateral Movement: This type of movement is when walls begin to bow or tilt outward, often due to soil pressure or inadequate drainage around the foundation.
Cracks at the Corner of Doors and Windows Inside the Home
These cracks can appear due to the differential settling of the foundation or inadequate structural support. Diagonal cracks at these locations, especially if they widen over time, may indicate a significant shift in the foundation. Monitoring these cracks for changes can be important in assessing ongoing structural issues.
Sloping and Uneven Floors in Older Homes
Common causes: Sloping floors can result from foundation issues, joist deterioration, or settlement of the home over time.
Impact: Besides being a potential trip hazard, they can affect the operation of doors and windows and may lead to further structural damage if not addressed.
Remedy: Solutions may involve leveling the floor by reinforcing foundation supports or installing new joists or beams. Costs can range significantly, from $1,000 to over $10,000, depending on the extent of the problem and the required repairs.
2nd – Plumbing System
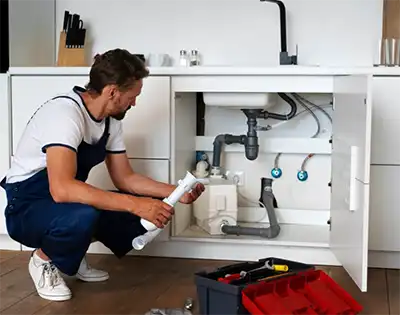
Using deliberate house inspection checklist can help you spot leaks and mold under sinks and in the basement.
Gently Run Water Through Tubs, Showers, and Faucets for Duration of Inspection
This checks for leaks, especially leaks that take time to form (like slow leaks under sinks or leaks at drain lines in the basement or crawlspace). Slow drains may indicate a blockage in the individual drain or in the common stack, which could be a bigger issue.
Water Heater Size and Age
Importance of Size: A typical family of four usually needs a 40-gallon tank.
Average Age of Water Heater: 10-12 Years
Replacement Signals: Look for signs of wear such as rust around the tank or water pooling underneath, which typically emerge as the unit nears the end of its lifespan.
Types of Water Lines (Based on Age)
Copper (Pre-1980s): Long-lasting and durable, but expensive; check for green stains indicating corrosion.
PEX (Post-1980s): Common in modern homes due to lower cost and ease of installation. Inspect for brittleness or cracks, particularly in colder climates.
Types of Drain Lines Based on Age:
Cast Iron (Pre-1970s): Very durable but prone to rusting and corrosion over decades. Check for signs of decay or blockages.
ABS or PVC (Post-1970s): These materials are lighter and easier to install than cast iron. However, ensure connections are sealed correctly to prevent leaks.
3rd – Roof
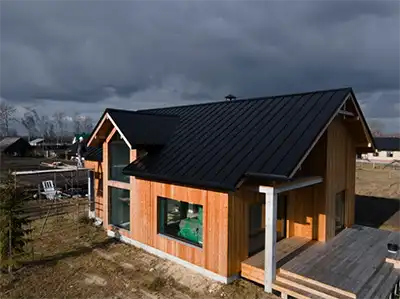
A carefully crafted house inspection checklist can help you figure out if the roof is just as nice as the sellers say it is.
To determine the age of shingles:
Examine the granules: Look at the amount of granule loss. Newer shingles have intact granules, while older ones show significant loss.
Check for curling or cracking: Shingles that are nearing the end of their lifespan often display curling edges or cracks.
Asphalt lasts between 15-25 years.
Asphalt shingles are the most common roofing material due to their cost-effectiveness and durability.
Wood shingles last about 15 years.
Wood shingles offer a natural aesthetic but generally have a shorter lifespan than other materials.
Signs of hail damage
Hail damage can compromise the integrity of roofing materials and is important to identify:
Random damage with no pattern: Hail damage is typically sporadic with no uniform pattern.
Impact marks: Look for black spots or indentations where granules have been knocked away.
Split shingles: Particularly in wood shingles, large hailstones can cause splits in the shingles.
4th – Electrical System
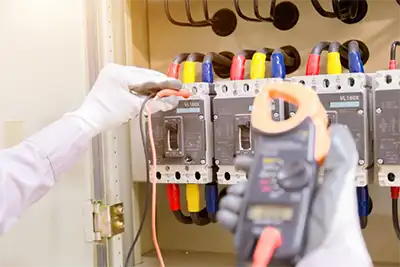
Electrical systems have gotten better in time but older electrical have safety hazards not many understand. Using a house inspection checklist based on real-world experience can help you navigate this treacherous terrain and save you thousands in unexpected grade costs.
200-amp service vs. 100-amp service vs. 60-amp service.
200-amp service: This is the modern standard for new homes and those with high electricity demands, such as homes with electric vehicles, multiple large appliances, and advanced home automation. A 200-amp service can handle multiple high-demand devices simultaneously without tripping breakers.
100-amp service: Suitable for small to medium-sized homes with average electrical needs. It can support most appliances but may struggle with simultaneous usage of multiple high-energy devices. This service is adequate for households without major additions or high-power luxury appliances.
60-amp service: Mostly found in older homes, a 60 amp service is generally insufficient for today’s average household needs. It lacks the capacity to handle multiple appliances running simultaneously (like air conditioners, dryers, and heaters), which can lead to frequent breaker trips and potential safety hazards.
Common issues with 60-amp service
Safety risks: Due to the lower capacity, there’s a higher risk of overloading circuits, which can cause fires or damage appliances.
Insufficient power: Struggles to meet the electrical demands of modern appliances and devices, which can lead to system overloads and frequent tripping of the main breaker.
Insurance and resale challenges: Many insurance companies require upgrades to 60 amp services before issuing policies, and potential home buyers may view such a service as a significant drawback, potentially affecting resale value.
Circuit breakers vs. fuses
Circuit breakers: These are reusable and can be easily reset after tripping due to a circuit overload or short circuit. They provide a convenient and safe way to manage home electrical systems, allowing for quick recovery from electrical issues without needing replacement parts.
Fuses: When a fuse blows due to an overload or fault in the circuit, it must be replaced. This can be less convenient than simply resetting a breaker. Fuses are typically found in older homes and are considered less user-friendly, especially for households with high and fluctuating electrical usage.
5th and finally – HVAC System
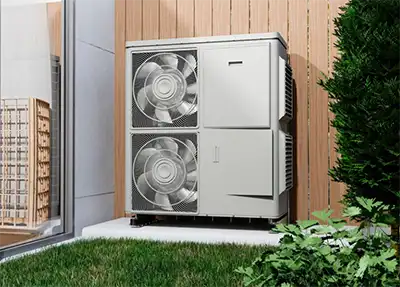
A good house inspection checklist can help you figure out just how old your HVAC system really is and help you estimate just how much longer they will last.
Check age of furnace
Average life of a furnace: 20-25 years.
The age of a furnace is a critical factor in determining its efficiency and reliability. As furnaces age, they become less efficient and more prone to breakdowns.
You can usually find the age of the furnace by looking at the serial number on the unit. This number often includes the date of manufacture. If it’s unclear, put the information into Google.
Check age of air conditioner or heat pump
Average life of AC or heat pump: 20-25 years.
Similar to furnaces, the age of air conditioners and heat pumps is an important indicator of their current condition and remaining lifespan.
The manufacture date can often be decoded from the serial number found on the outside unit of the system. Again, if this information is not obvious, plug it all into your nearest web browser.
Conclusion:
This simple 30-minute DIY house inspection checklist is a powerful tool to keep you from wasting valuable time and money while searching for your next home. It’s a great first step for any homebuyer to take before making an offer or scheduling the full home inspection. Remember, while this checklist will help you spot obvious problems, it doesn’t replace the expertise and experience of a professional home inspector.
By the way, if you’d like all this information inside a professional all-in-one, full-color, 13-page field guide you can carry around while you tour homes, you can get one made by yours truly our website.


